IIS - Certificate Installation
This manual applies to IIS 7, 8, 8.5 and 10. A different manual is available for IIS 5 and 6, and Exchange 2000 and 2003.
Note: Do you specifically want to replace an EV (Extended Validation) certificate after a reissue based on the same private key, and do you get the error message that the Private Key is not found? Then use this manual to link the replacement certificate to the old private key.
Immediately after being issued, your SSL certificate will be sent to you by email. It is also possible to download the certificate from the Control Panel. The file containing the certificate will have the same name as the domain name it is meant for (for example: www_sslcertificaten_nl.crt).
Certificate Installation
Save the certificate files that were sent, so that they are accessible from the server.
- Click the Start menu → Administrative Tools → IIS Manager.
- Choose the server name and then click Features (middle field).
- Double-click Server Certificates under Security.
- On the right-hand side click Complete Certificate Request under Actions. A new window will open.
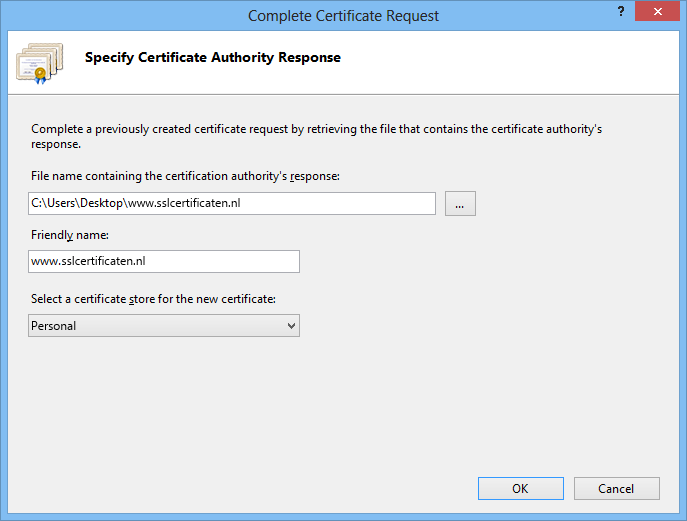
- Navigate to the saved certificate; the standard file name follows this structure your_domain_com.crt. Note: If you have purchased a certificate for which a root and intermediate certificate must be installed, it is practical to use the .p7b-file, as this installs both the root and intermediate certificates.

- Enter a practical name for the Friendly name - such as the domain name - and click OK. The certificate is now installed and ready to be bound to the website.
Bind certificate to the website
The certificate can now be activated. To do this the website first has to be bound to the HTTPS protocol, after which the certificate can be assigned to the website. To bind the certificate to the website via the user interface follow the steps below. Other options are to use the Powershell or Command Prompt.
- Click the Start menu → Administrative Tools → IIS Manager.
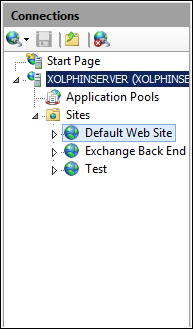
- In the IIS Manager use the left menu to browse to the server that hosts the website that must be secured, go to Sites and select the website which must be secured using the new certificate.
- In the Action panel to the right, click Bindings.

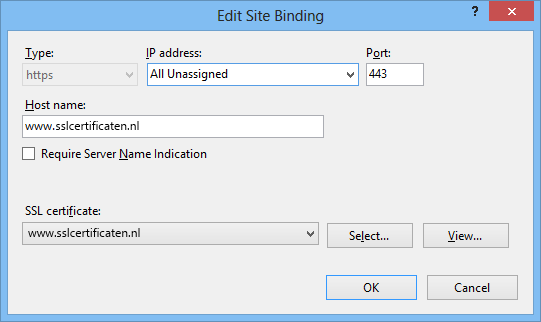
- In the Site Bindings window click Add... to open the Add Site Binding window..
- Enter https as Type, the IP-address of the server through which the website is accessed, and the port to be used (the default is 443). Click the Browse button, select the just installed certificate and click OK.
All necessary steps to install your web server certificate have now been completed. Please make sure to adequately secure your certificate files, and to store a backup of your private key and web server certificate in a safe location. You should also install the root and intermediate certificates. Check whether the certificate is correctly installed with the SSLCheck and ensure an optimal configuration with these tips and settings.
Please do not hesitate to contact us if you encounter problems or error messages.
SSLCheck
Our SSLCheck will examine your website's root and intermediate certificates for correctness and report any potential issues
