Generate CSR with MMC
- Open the Local Machine Certificate Store via the MMC.
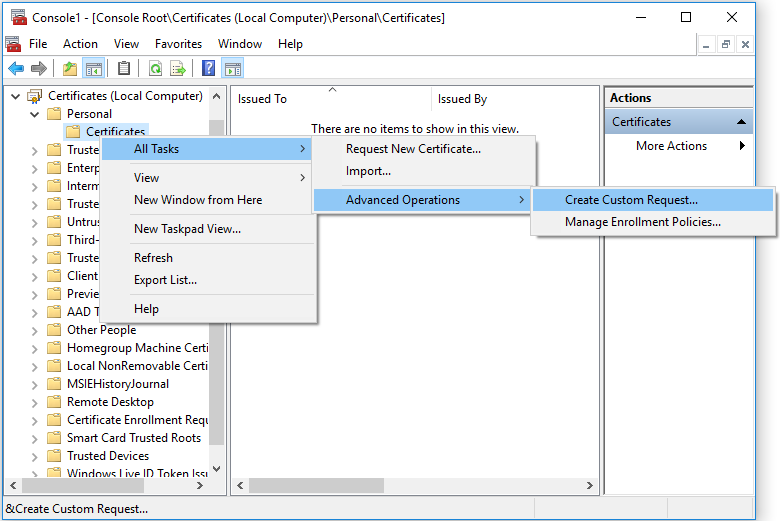
- Right-click with your mouse on Personal and select All tasks → Advanced operations → Create custom request
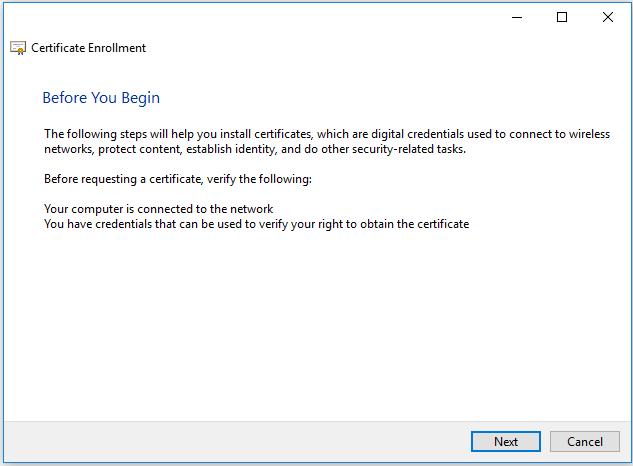
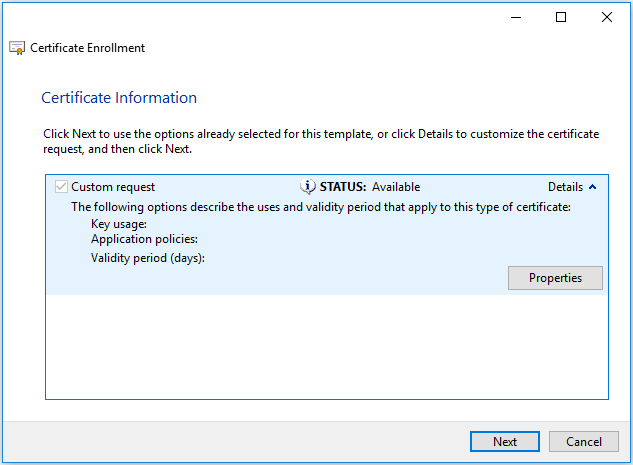
- A new screen with the title "Certificate Enrollment" appears. Click on Next
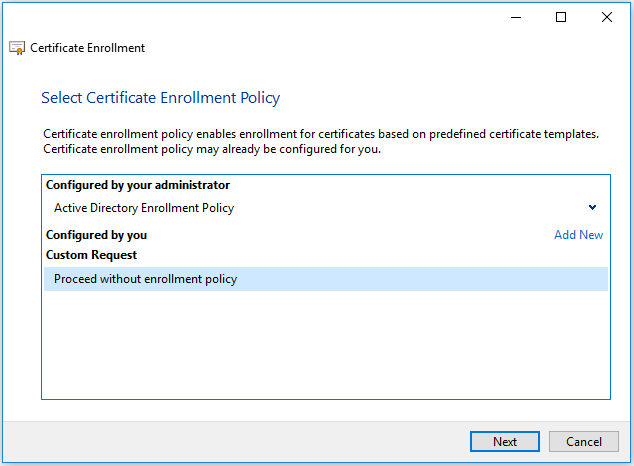
- Select Custom Request -> Proceed without enrollment policy
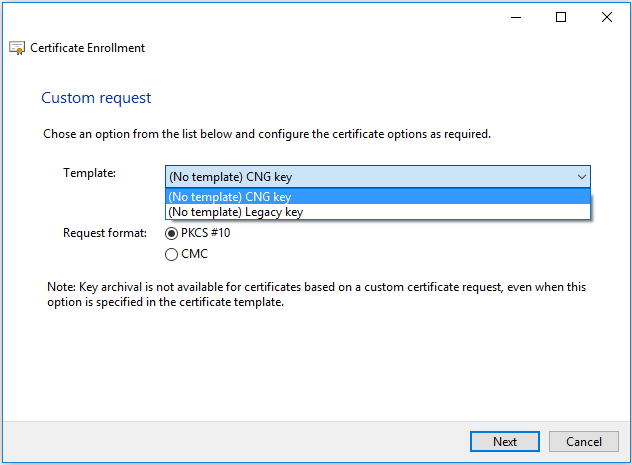
- For usage with Microsoft TMG, RDP, or ADFS on Azure You need to select (No template) Legacy key as template, for all other usages you can leave the settings on default. Click Next
- Click on the down-arrow next to Details and then on Properties
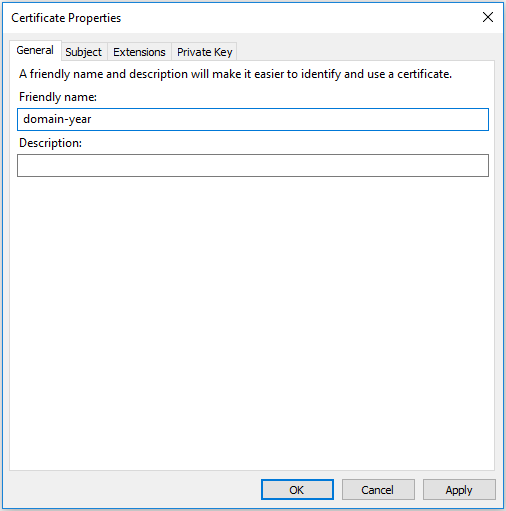
- On the tab General you enter a Friendly name to use for the certificate and go to the next tab
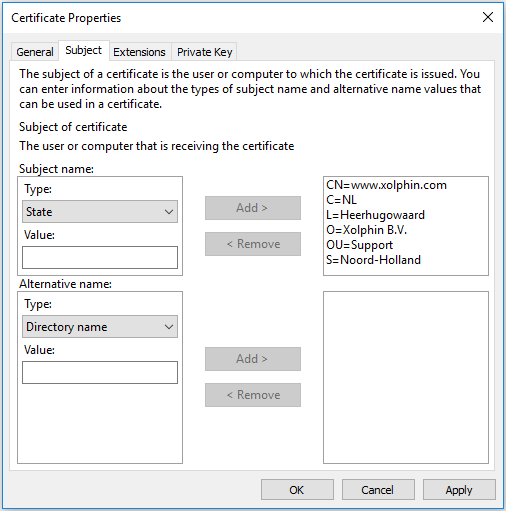
- On the tab Subject you need to enter the request details:
- Common name
- Country
- Locality
- Organization
- Organization unit
- State
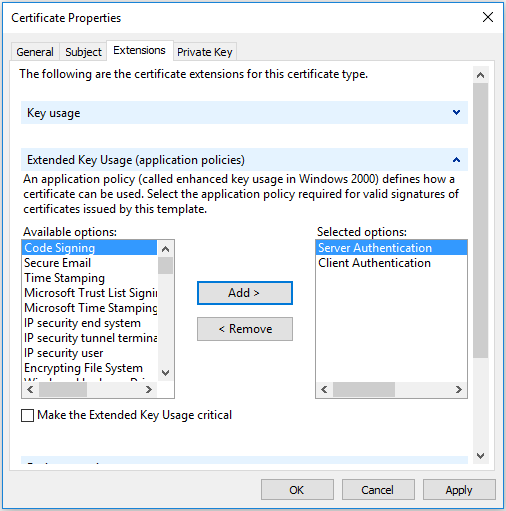
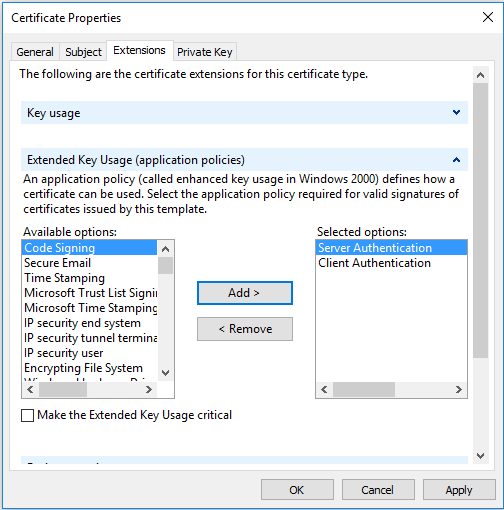
- On the tab Extensions click on the arrow next to Extended Key usage. Select for Available options the options server authentication and click on Add. Repeat these steps for client authentication. Then navigate to the last tab.
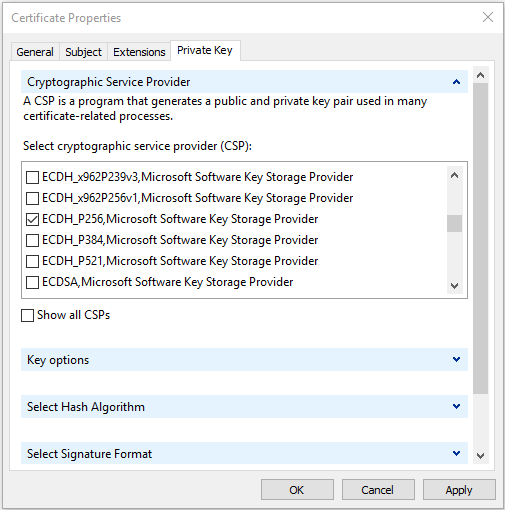
- On the tab Private key, click on the arrow-button next to Cryptographic service provider.
- When you want to use a RSA key, select the RSA, Microsoft software key storage provider
- When you want to use a Legacy key template, deselect Microsoft Strong Cryptographic Provider, and select Microsoft RSA SChannel Cryptographic Provider and then under Key options select as key size: 2048.
- When you want to use an ECC key, select ECDSA_P256, Microsoft Software Key Storage Provider.
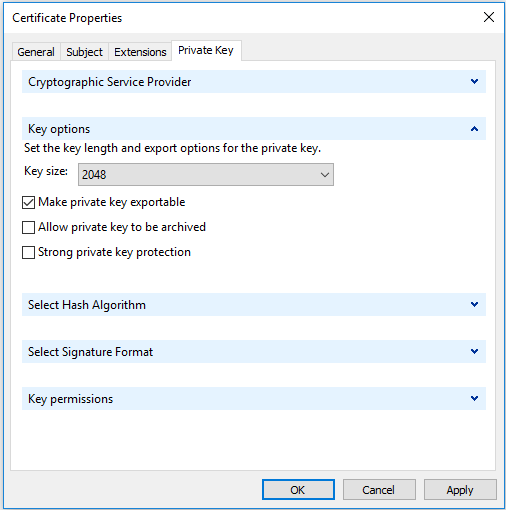
- Check the option Make private key exportable when you want to exort the certificate later on to a .pfx bestand.
- Click on Apply and then Ok
- Click on Next. In the following screen click on Browse... to select where you want to store the CSR, then name it (like: CSR) and click Save.
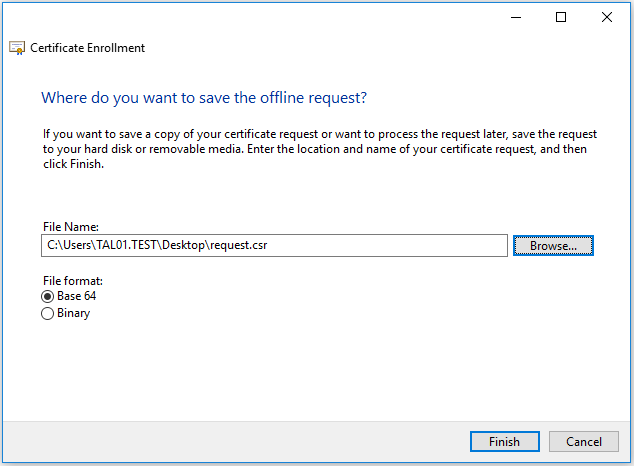
- Click on Finish
SSLCheck
Our SSLCheck will examine your website's root and intermediate certificates for correctness and report any potential issues
